I remember walking into a secondary school kitchen three years ago during a lunch rush; the chaos was palpable, but it wasn’t the shouting that got to me—it was the sight of a cook swearing at a digital display that insisted a chicken breast was 75°C when it was clearly still pink in the middle. They weren’t being lazy; they were just relying on a tool they hadn’t checked in six months. Most people think knowing how to calibrate a probe thermometer is some high-level technical chore reserved for laboratory scientists, but the truth is much simpler and far more urgent. If you aren’t taking two minutes to verify your equipment, you aren’t actually monitoring food safety; you are just guessing with expensive numbers.
I’m not here to give you a lecture or a fifty-page manual that will only end up buried under a stack of delivery notes. Instead, I’m going to show you the most practical, “no-nonsense” way to perform an ice-point check that actually works in a busy, high-pressure kitchen. We will cover exactly what you need, how to do it without disrupting your service, and how to actually document it so that when an inspector walks through that door, you can show them—not just tell them—that your kitchen is safe.
Table of Contents
- Step-by-Step Instructions
- Mastering the Ice Point Method for Reliable Accuracy
- Boiling Point Method and Essential Temperature Deviation Correction
- Five Reality Checks to Keep Your Calibration from Becoming a Chore
- The Bottom Line: Don't Let a Broken Probe Become Your Problem
- Frequently Asked Questions
Guide Overview
Tools & Supplies
- Probe thermometer (the device being calibrated)
- Small saucepan or heat-safe container (to hold water)
- Water (enough to submerge probe tip)
- Ice cubes (large quantity for crushed ice method)
Step-by-Step Instructions
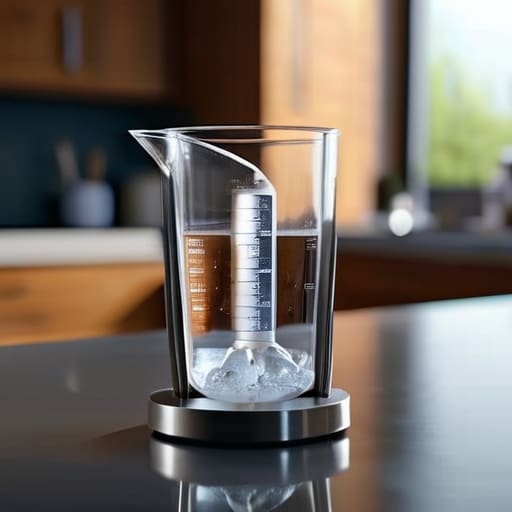
- 1. First, grab a clean glass or a sturdy mug and fill it with crushed ice. You want the ice to be packed tightly all the way to the top, then add just enough chilled water to fill the gaps. The goal here is to create a slurry, not a glass of water with some ice cubes floating in it. If there’s too much water and not enough ice, your reading will be too high, and you’re back to guessing again.
- 2. Clean your probe thoroughly. I know, it sounds obvious, but I’ve seen more errors caused by a bit of dried sauce on a sensor than by actual faulty equipment. Use a food-grade sanitiser wipe or a clean cloth to make sure the probe is pristine before it touches anything. You want a clean reading, not a reading influenced by yesterday’s gravy.
- 3. Insert the probe into the center of your ice slurry. Don’t just tap the surface; you need to submerge the sensor part of the probe deep into the middle of the ice. Hold it there for about thirty seconds to let the temperature stabilise. If you pull it out too early, you’re just chasing a moving target.
- 4. Watch the display. A properly functioning thermometer should read 0°C (32°F). If it’s sitting at 1°C or 2°C, don’t panic, but don’t ignore it either. This is the moment where you decide if the tool is actually doing its job or if it’s become a liability in your kitchen.
- 5. Adjust the device if it allows. Most digital probes have a small button or a setting to calibrate, or you can use the “offset” function in your digital log. If it’s a manual dial thermometer, turn the nut under the head until the needle settles exactly on the zero mark. If it’s a cheap unit that doesn’t allow for adjustment, write it down and mark it as “out of calibration” so no one uses it for critical cooking temps.
- 6. Double-check with a second test. Once you think you’ve fixed it, put the probe back into a fresh batch of ice slurry. If it hits zero again, you’re good to go. This second check is the difference between thinking you’re safe and actually being safe.
- 7. Log the result. This is the part everyone hates, but it’s the most important bit for when an inspector—me or one of my colleagues—walks through your door. Note the date, the time, and the reading. It takes ten seconds, but it proves you aren’t just ticking boxes; you’re actually managing the risk.
Mastering the Ice Point Method for Reliable Accuracy
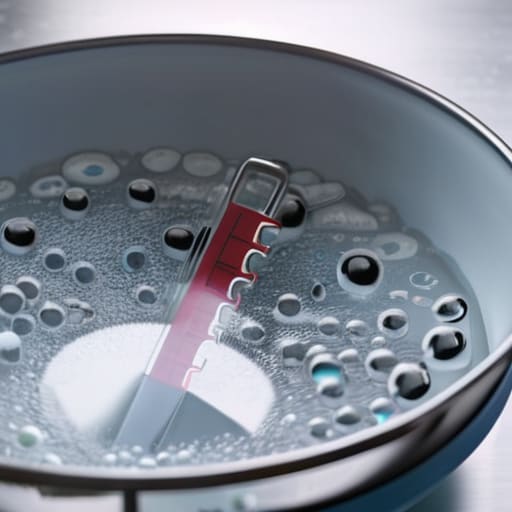
I’ve seen too many kitchens skip the ice point method because they think it’s a faff, opting instead for the boiling point method. While boiling water is fine in theory, it’s a nightmare in a busy school kitchen—you’re dealing with steam, potential burns, and altitude changes that can skew your results. The ice point method is much more stable. You aren’t fighting physics; you’re just checking if your probe can find zero degrees in a slurry of crushed ice and cold water. If your reading is drifting, don’t just shrug it off. A small temperature deviation correction now is much easier than explaining to a parent why a child’s meal was served in the danger zone.
Once you’ve actually done the work, don’t just walk away. This is where most teams fail. If you’ve performed a digital thermometer adjustment, you need to record it. I don’t care if your paperwork is thin, but please, keep a simple thermometer calibration log. It’s your only shield when an inspector asks how you know your equipment is actually working. It turns “we think it’s fine” into documented proof of safety.
Boiling Point Method and Essential Temperature Deviation Correction
Now, while the ice point method is my go-to because it’s harder to mess up, you might occasionally find yourself using the boiling point method. It’s useful if you’re already boiling water for pasta or tea, but be warned: it’s much more temperamental. Atmospheric pressure changes depending on whether you’re in the middle of London or up in the Highlands, which can throw your reading off by a degree or two. If you use this way, just make sure you aren’t distracted by a service bell; you need to hold that probe in the center of the rolling boil for a few seconds to get a true reading.
Once you’ve found a discrepancy, don’t just shrug it off. If your device allows for digital thermometer adjustment, use it immediately. However, if it’s a cheaper model that doesn’t allow for internal correction, you need to be honest in your thermometer calibration log. If the probe is drifting too far, it’s not a “glitch”—it’s a broken tool. Don’t try to “work around” a dodgy reading; just bin it and get a new one. It’s cheaper than an investigation.
Five Reality Checks to Keep Your Calibration from Becoming a Chore
- Don’t wait for a formal audit to do this. If you only calibrate when the inspector is standing there with a clipboard, you’ve already lost the plot. Make it part of your weekly rhythm—something small and boring that actually works.
- Keep a dedicated “calibration log” that isn’t a massive, intimidating binder. A simple notebook or a single sheet tucked near the thermometer station is plenty. If it’s too much paperwork, your staff won’t do it, and if they don’t do it, the data is useless.
- Watch out for “thermometer drift.” Even the expensive digital ones can start to wander if they’re being knocked around in a busy kitchen or if the batteries are getting low. If you notice a consistent offset, don’t just ignore it; address it immediately.
- Clean the probe properly before and after every single check. I’ve seen people try to calibrate a probe that still has a film of grease or dried protein on it, and they end up chasing a temperature reading that’s completely wrong.
- If your thermometer is more than a few degrees off and you can’t get it to settle after a proper ice bath check, stop trying to fix it. In a high-pressure kitchen, a dodgy thermometer is a liability you don’t need. Just bin it and get a new one.
The Bottom Line: Don't Let a Broken Probe Become Your Problem
Calibration isn’t a “once a term” box-ticking exercise; it’s a daily reality check. If your thermometer is off by even a couple of degrees, your entire temperature log is just a collection of expensive lies.
Stick to the ice point method for your routine checks. It’s faster, more consistent, and much harder to mess up when you’re in the middle of a lunch rush than trying to manage a rolling boil.
If the probe fails the test, don’t try to “work around it.” A faulty thermometer is a liability you can’t afford, especially in a school setting. Replace it immediately and get back to basics.
Frequently Asked Questions
How often am I actually supposed to do this—is once a week enough, or am I just waiting for a disaster to happen?
If you’re asking me this, you’ve probably already felt that nagging doubt during a busy service. Here’s the truth: once a week is a fine baseline for a well-run kitchen, but it isn’t a golden rule. If you’ve just dropped a probe on a hard floor, or if you’ve noticed your readings drifting during a heavy lunch rush, calibrate it immediately. Don’t wait for the weekly schedule. Trust your gut, not just the calendar.
What do I do if the thermometer is off by more than a degree or two; is it time to bin it and buy a new one?
If your probe is drifting by more than 2°C, stop using it for critical checks immediately. First, try a deep clean—sometimes dried protein or scale on the sensor throws the reading. If it’s still wonky after a thorough scrub, bin it. I’ve seen people try to “work around” a faulty probe, and that’s exactly how a child ends up with food poisoning. A new thermometer is a small price to pay for certainty.
Does it really matter if I use tap water instead of crushed ice, or is that just making things harder for no reason?
It’s not just about making things harder; it’s about making them right. If you use tap water, you’re at the mercy of your kitchen’s plumbing and the ambient temperature. I’ve seen people “calibrate” a probe in lukewarm tap water and walk away thinking they’re safe, when in reality, they’re off by two degrees. In a school kitchen, two degrees is the difference between a safe meal and a massive risk. Use the crushed ice. It’s a small effort for a certain result.