I’ve stood in the middle of many a frantic school kitchen at 2:00 PM, watching a staff member stare helplessly at a massive, steaming vat of Bolognese that’s been sitting on the prep table for far too long. There is a specific, heavy smell to a kitchen that’s lost control of its temperatures—a cloying, humid heat that tells me the danger zone is currently winning. Most of the training manuals will give you a lecture on complex thermal curves, but when you’re serving four hundred hungry kids, you don’t need a physics degree; you just need to know how to cool cooked food safely without breaking your back or your budget.
I am not here to sell you on expensive blast chillers that your maintenance team won’t be able to fix by Tuesday. My promise to you is much simpler: I’m going to give you the unvarnished reality of temperature control. We are going to talk about the small, boring, and highly effective habits—like portioning into shallow trays and timing your cleaning rotas—that actually keep the bacteria at bay. I’ll show you what is genuinely sustainable when the lunch rush is hitting and the staff is stretched thin.
Table of Contents
Mastering the Two Stage Cooling Method Without Chaos
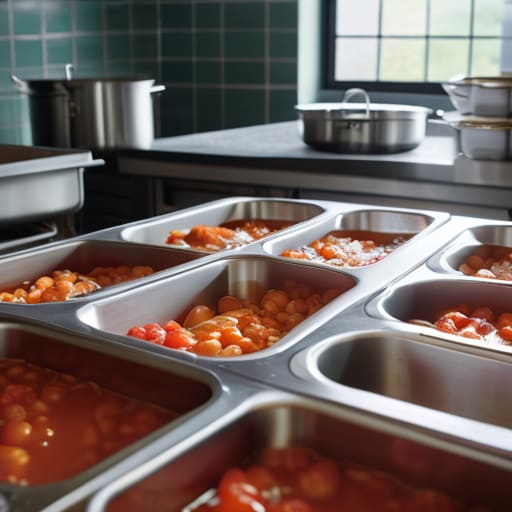
The biggest mistake I see in school kitchens isn’t a lack of knowledge; it’s a lack of space and time. People try to shove massive, steaming trays of pasta or stew straight into the walk-in, which does nothing but turn your fridge into a warm, humid incubator for pathogens. You need to respect the two-stage cooling method, but you have to do it in a way that doesn’t halt your entire service. The first stage is about getting that food from 60°C down to 20°C as fast as humanly possible. I don’t care if you have to use shallow GN trays or even an ice bath cooling technique for smaller batches—the goal is to get through that critical window before the heat stays trapped in the core.
Once you’ve hit that 20°C mark, you have to move quickly into the second stage: getting it down to 5°C or below. This is where most people slip up by leaving containers on the prep table “to finish cooling.” If you aren’t careful, you’re just inviting trouble by lingering in the danger zone temperature range. Don’t overcomplicate it with fancy gadgets; just focus on breaking down large volumes into smaller, shallow containers that can actually handle the chill of your refrigeration.
Defeating the Danger Zone Temperature Range
Here is the reality of the danger zone temperature range: it isn’t just a theoretical concept from a textbook; it is the window of time where bacteria go from “present” to “problematic.” In a busy school kitchen, the temptation is to grab a massive, steaming tray of pasta sauce and shove it straight into the walk-in. Don’t do that. You’ll end up with a lukewarm “heat island” in the middle of your fridge that raises the temperature of everything around it, effectively inviting spoilage into your entire stock.
If you are struggling to get temperatures down fast enough during a heavy service, stop trying to fight physics with sheer willpower and use an ice bath cooling technique instead. It’s old-school, but it works. Submerge your smaller containers in a sink of ice water to pull that core temperature down rapidly. This isn’t about being fancy; it’s about preventing bacterial growth in leftovers and ensuring that when you pull that food out for tomorrow’s lunch, it is actually safe to serve. Focus on the speed of the descent, not just the final number.
Five Real-World Rules for When the Kitchen Gets Chaotic
- Stop the ‘Big Pot’ Habit: I’ve seen too many kitchens try to save time by leaving a massive, deep stockpot of hot gravy on the counter to ‘cool down naturally.’ It won’t. The middle stays dangerously hot for hours while the outside gets lukewarm. If you want to actually hit your temperature targets, you have to portion it out into shallow trays immediately.
- The Ice Bath Shortcut: If you’re running behind and that batch of sauce is still steaming, don’t just pray it cools. Use a sink with cold water and ice. It’s an old-school move, but it’s the fastest way to drop the core temperature of a container without waiting for the ambient air to do the work for you.
- Leave the Lids Off (Initially): This sounds counter-intuitive, but if you seal a hot container tight, you’re essentially creating a little steam oven that keeps the food in the danger zone longer. Keep the lids slightly ajar or off entirely until the food has actually dropped to a safe temperature, then seal it up for the fridge.
- Respect the Fridge’s Limits: Just because you’ve put a warm container in the walk-in doesn’t mean you’re safe. If you cram ten hot trays into a fridge at once, you’ll spike the temperature of the entire unit, potentially putting your milk and meat at risk. Space them out, or better yet, get them down to room temp on the counter first.
- If It’s Not Logged, It Didn’t Happen: I know, I know—you’re short-staffed and the paperwork feels like a secondary concern. But if you can’t prove that the food passed through the cooling stage correctly, you’re sitting on a massive liability. Make the temperature check a non-negotiable part of the workflow, not an afterthought.
The Bottom Line: What Actually Matters When the Rush Hits
Stop treating cooling like an afterthought; it is a critical cooking step. If you leave a massive pot of hot soup to sit on the counter because “it’ll cool down eventually,” you aren’t just being lazy, you are actively inviting bacteria to multiply.
Focus on surface area, not just time. You don’t need fancy equipment, you just need smaller, shallower containers. Breaking food down into manageable portions is the only way to ensure the core temperature actually drops before the clock runs out.
If it isn’t written down, it didn’t happen. I don’t care how busy you are—if your temperature logs are blank, you have no proof you’ve kept those kids safe. Make the log a habit, not a chore you do when you think I’m coming around.
Frequently Asked Questions
I don't have an ice bath or a blast chiller; what is the absolute bare minimum I can do with a standard commercial fridge?
Look, I’m not going to tell you to go out and buy a blast chiller you can’t afford. If you’re working with a standard fridge, your best friend is portion control. Stop trying to cool massive, deep pots; they’ll stay warm in the middle for hours and turn your fridge into a sauna. Use shallow, wide containers instead. Get the food into small batches, spread it thin, and get it into the fridge immediately. It’s basic, but it works.
How do I know if a large batch of food has actually cooled in the middle, or if it's just the surface that feels cold?
If you’re just touching the lid or the top layer, you’re fooling yourself. I’ve seen enough “cooled” stews turn into bacterial breeding grounds because the core was still steaming. Don’t guess. Use a probe thermometer, and don’t be shy about it. You need to pierce the very centre of the thickest part of the batch. If that core hasn’t dropped through the danger zone, the surface temperature is irrelevant. Stick the probe in, wait for the reading to stabilise, and trust the numbers, not your hand.
If I'm running short-staffed during the lunch rush, is it safer to hold hot food at temperature or risk cooling it too slowly?
If you’re in the thick of a lunch rush and short-staffed, hold the hot food. It is far safer to keep a tray of pasta at 63°C than to leave it sitting on a prep table while you scramble to find clean containers for cooling. If you can’t manage the cooling process properly right now, don’t start it. Keep it hot, keep it safe, and deal with the cooling once the chaos subsides.