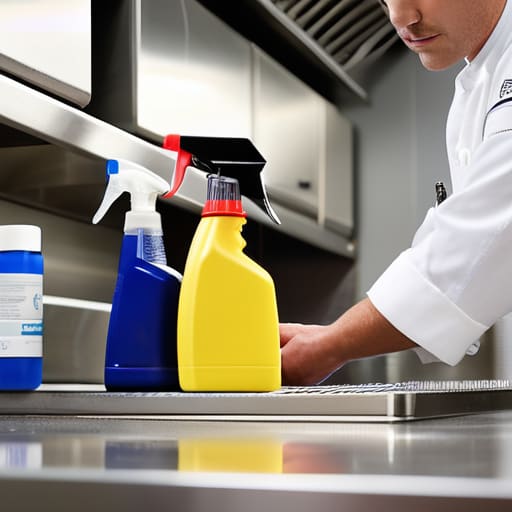
I once walked into a secondary school kitchen during a mid-morning rush, and the smell of industrial-strength degreaser was so thick it felt like it was coating the back of my throat. The manager was frantic, clutching a three-inch-thick binder that was supposed to be his complete guide to COSHH, but he couldn’t tell me where the safety data sheet for the floor cleaner was if his life depended on it. That’s the problem with most advice on this subject; it treats chemical safety like a desk job for academics rather than a high-pressure reality for people trying to serve four hundred hot meals before the bell rings.
I am not here to hand you a mountain of paperwork that will just gather dust on a shelf or end up in the bin by Friday. Instead, I’m going to give you a realistic roadmap for managing chemicals without losing your mind or your budget. We are going to focus on the practical controls that actually stop a staff member from getting a chemical burn during a hectic clean-down, and I promise to be honest about what you can actually sustain when the kitchen is at its busiest.
Table of Contents
Identifying Hazardous Substances at Work Without Wasting Time
When I walk into a kitchen, I don’t expect to see a library of chemical manuals; I expect to see a tidy, organized cupboard. Identifying hazardous substances at work shouldn’t be a massive administrative project that eats up your prep time. Start with the basics: look at every bottle under the sink, every spray in the dishwash area, and every concentrated degreaser in the storeroom. If it’s a liquid, a powder, or a gas that can cause harm if inhaled, swallowed, or touched, it’s on your list.
The quickest way to do this without losing your mind is to lean on the safety data sheets importance—the manufacturers have already done the heavy lifting for you. You don’t need to reinvent the wheel; just grab the sheets, see what the specific risks are, and note them down. Once you know what you’re dealing with, you can stop guessing and start applying actual control measures for hazardous chemicals, like ensuring the right gloves are actually in the cupboard and not lost in a drawer. It’s about knowing what’s in your hands before the lunch rush hits.
Why Safety Data Sheets Importance Cannot Be Overstated
I’ve seen it a dozen times: a new staff member grabs a spray bottle from the cupboard, uses it, and then—because they’re in the middle of a rush—they don’t realize they’ve just inhaled something that shouldn’t be breathed in. This is exactly why the safety data sheets importance gets lost in translation. These aren’t just pieces of paper to be shoved into a dusty lever-arch file for an inspector to find; they are the literal instruction manual for what happens when things go wrong. If a concentrated degreaser splashes into someone’s eye, you don’t want to be scrolling through a generic website; you need to know immediately if you rinse with water or if you need a specific neutralizer.
When you are managing control measures for hazardous chemicals, the Safety Data Sheet (SDS) is your baseline. It tells you the truth about the substance—the toxicity, the flammability, and the exact PPE required. I’m not asking you to memorize every chemical in the building, but I am telling you that your team needs to know where those sheets are kept and how to read the basic warnings. If you can’t tell a junior chef what to do when a chemical spill occurs, your safety system isn’t working; it’s just performing.
Five Ways to Make COSHH Actually Work When the Lunch Rush Hits
- Stop the “mystery bottle” habit. If you’ve decanted a heavy-duty degreaser from a large container into a smaller spray bottle for easier use, that bottle needs a label immediately. I’ve seen too many staff members accidentally use a chemical that looks like water but eats through skin, simply because the original label was tossed in the bin.
- Keep your COSHH folder where people actually work. If your safety assessments are tucked away in a dusty binder in the manager’s office behind a locked door, they aren’t helping anyone. Put a simplified version—or at least the most critical info—in the kitchen area so a chef can check a hazard without leaving the line.
- Match your cleaning schedule to your chemical strength. You don’t need the most caustic, aggressive oven cleaner for a light daily wipe-down. Using high-strength chemicals for low-risk tasks just increases the chances of someone inhaling fumes or getting a splash in the eye. Use the right tool for the job, not just the strongest one you’ve got.
- Training shouldn’t be a once-a-year lecture. It needs to be a five-minute conversation during a briefing. Instead of a formal classroom session, show the team how to read the hazard symbols on the actual bottles they use every day. If they can’t spot the ‘corrosive’ symbol in a split second, the training hasn’t stuck.
- Check your storage as often as you check your temps. Chemicals belong in a dedicated, ventilated area—not on the shelf right next to the flour or the spices. I’ve walked into kitchens where a leak from a cleaning agent could have contaminated an entire dry store, and that’s a disaster that is entirely avoidable with a bit of basic spatial discipline.
The Bottom Line: Making COSHH Work in a Busy Kitchen
Stop chasing paperwork for the sake of it; focus your energy on the high-risk chemicals—like heavy-duty degreasers and concentrated sanitizers—that actually pose a threat if they splash or leak.
If a Safety Data Sheet (SDS) is tucked away in a dusty folder in the manager’s office where no one can find it during a chemical splash, it’s effectively useless; keep the essentials accessible and understood by the people actually doing the cleaning.
Proper labeling isn’t just about compliance; it’s about preventing a catastrophic mistake where a staff member reaches for a spray bottle in a rush and grabs a caustic cleaner instead of a food-safe sanitizer.
Frequently Asked Questions
We use a lot of different spray bottles and decanted liquids; do I need a separate COSHH assessment for every single one, or can I group them?
You don’t need a mountain of paperwork for every single spray bottle, but you can’t just lump everything together either. You can group them by “family”—for example, all your standard surface sanitizers can sit under one assessment if they share the same risks and usage. However, if you’ve decanted a heavy-duty degreaser into a different bottle, that needs its own space. Grouping saves time; ignoring the difference between a spray and a concentrated liquid causes accidents.
My staff are constantly moving between prep and cleaning; how do I make sure they actually follow the safety instructions when we're in the middle of a rush?
The rush is exactly when mistakes happen, not when they’re avoided. If your team is bouncing between prep and cleaning, you don’t need more paperwork; you need better physical boundaries. Stop storing chemicals near prep surfaces, period. Use colour-coded buckets and dedicated stations so there’s no guesswork when the tickets start piling up. If a staff member has to think about which spray to use during a rush, your system has already failed.
If we’ve switched to a new eco-friendly brand of detergent, do I have to scrap my old paperwork and start the whole assessment process from scratch?
Short answer: Yes, you have to update it.