I’ve spent sixteen years walking into kitchens where the floor plan looks like a beautiful, expensive architectural drawing, only to realize within minutes that it’s a total disaster in practice. I once stood in a school kitchen during a frantic lunch service, watching a terrified prep cook dodge a porter carrying a stack of dirty trays just to reach the salad station. It didn’t matter how much they’d spent on stainless steel; they hadn’t actually considered how a commercial kitchen should be laid out to prevent people from constantly tripping over one another. Most consultants will sell you on “flow” and “ergonomics” as if they’re designing a luxury showroom, but they rarely account for the reality of a skeleton crew working under a deadline.
I’m not here to give you a lecture on aesthetic design or high-end finishes. My promise to you is much more practical: I am going to show you how to organize your space so that safety becomes the path of least resistance. We are going to focus on the high-risk zones—separating your raw prep from your plating and keeping your cleaning stations away from the service line—so you can run a kitchen that is actually sustainable for your staff.
Table of Contents
Prioritizing Food Safety Zoning Over Aesthetic Trends
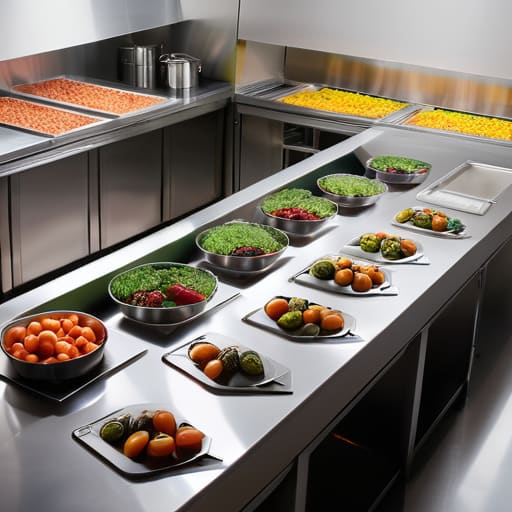
I’ve walked into enough “designer” kitchens to know that a sleek, open-plan look means nothing if your prep cook has to walk through a puddle of grey dishwater just to reach the vegetable station. Trends change, but physics and microbiology don’t. When I look at a floor plan, I’m not looking for how much it costs; I’m looking for food safety zoning that actually works. You need clear, physical boundaries between your “dirty” zones—where raw proteins and unwashed produce live—and your “clean” zones for plating and service. If your layout forces a staff member to carry a crate of raw chicken past a station where salad is being tossed, you haven’t just designed a bad kitchen; you’ve designed a cross-contamination nightmare.
Don’t get distracted by the latest gadgetry if it breaks your back-of-house operational flow. A kitchen that looks good in a brochure often fails the reality test of a Tuesday lunch rush. Instead of chasing an aesthetic, focus on a logical sequence: delivery, storage, prep, cooking, and cleaning. If your workflow requires constant backtracking, your team will start taking shortcuts to save time, and that is exactly when the mistakes happen.
Kitchen Workflow Optimization for Exhausted Teams
When I walk into a kitchen at 11:30 AM, I’m not looking at how shiny the stainless steel is; I’m watching how your staff move. If I see a prep cook having to dodge a dishwasher just to reach the walk-in, or a server tripping over a trolley path, I know you’re headed for a mistake. True kitchen workflow optimization isn’t about fancy gadgets; it’s about reducing the number of unnecessary steps a tired person has to take. When people are rushed and exhausted, they take shortcuts. If your layout forces them to cross paths between raw prep and cooked service, those shortcuts will eventually lead to a cross-contamination nightmare.
You have to design for the person working their tenth hour on a Friday. This means focusing on logical, linear movement—from delivery to storage, then prep, cooking, and finally service. Don’t get caught up in the myth of the perfect “work triangle” used in domestic kitchens; in a high-volume setting, you need dedicated zones that prevent staff from colliding. If you can’t afford a total remodel, focus on commercial kitchen equipment placement that keeps your high-risk tasks, like allergen-sensitive prep, physically isolated from the chaos of the main line.
Five Practical Rules for a Layout That Actually Works Under Pressure
- Stop the “Cross-Over” Chaos: Design your flow so that raw protein prep and final plating never share the same footprint; if your staff has to walk past the raw chicken station to reach the salad prep, you’ve already lost the battle against cross-contamination.
- The Sink Strategy: Don’t just stick a handwash basin wherever there’s a gap; place them exactly where the hands get dirty—usually right at the entry point of the prep zone—so it’s a conscious habit rather than a trek across the room.
- Storage That Makes Sense: Keep your high-turnover, high-risk ingredients (like dairy and meat) in a fridge that is physically close to the prep area, not tucked away in a walk-in at the far end of the building where temperature logs become a chore to maintain.
- Clear the “Dead Zones”: If you have a corner of the kitchen that serves no purpose other than holding empty crates or cleaning chemicals, it’s a hazard waiting to happen; every square inch should either be helping you cook or helping you clean.
- Respect the Dish Pit: Your dirty dish area needs to be a one-way street; if the dirty plates are piling up near the clean service area because the layout is cramped, you’re inviting a contamination incident that no amount of training can fix.
The Bottom Line for Your Kitchen Floor Plan
Forget the “open concept” or trendy layouts you see in magazines; if your prep area is physically wedged between the bin store and the raw meat station, no amount of staff training will stop cross-contamination from happening during a lunch rush.
Design for your worst-case staffing scenario, not your best; ensure the most critical safety steps—like checking temperatures or managing allergens—can be done without staff tripping over each other or crossing through “dirty” zones.
Map your workflow to the movement of the food, not the convenience of the person cleaning; a layout that forces a logical, one-way flow from raw to cooked reduces the mental load on an exhausted team and keeps the risk manageable.
Frequently Asked Questions
I've already got the equipment in place and the walls are up; how do I fix a bad flow without a massive renovation budget?
You don’t need a sledgehammer to fix a broken flow; you need better discipline. If your prep area is too close to the bin or the dirty wash-up, stop trying to “make it work” and start re-zoning with what you have. Use mobile stainless steel tables to create physical barriers between raw and cooked zones. It’s about directing the movement of people and waste, not moving the plumbing. If you can’t change the walls, change the path.
How much physical distance do I actually need between the raw prep area and the service line to satisfy an inspector?
Look, I’m not going to give you a measurement in inches; I’ve never seen an inspector pull out a tape measure just to settle a dispute. What they’re looking for is a functional barrier. If your raw chicken prep is happening close enough to the service line that a stray splash or a rogue drip could hit a plated meal, you’ve failed. You need enough physical or procedural separation that your team isn’t crossing paths with high-risk waste.
If I’m working with a tiny, cramped kitchen, where is the one place I absolutely cannot compromise on layout?
If you’re working in a shoebox, forget about fancy prep islands or trendy open shelving. You cannot, under any circumstances, compromise on the separation between your raw prep and your service area. If your layout forces a cook to carry a tray of raw chicken past a stack of clean plates just to reach the oven, you’ve already lost the battle. Keep that cross-contamination risk physically blocked off, even if it makes the room feel smaller.